Pages

Showing posts with label home decor. Show all posts

Friday, September 8, 2023

variations on a theme


Once upon a time, I shared with my house group this inconspicuous dream of creating art that would express a spiritual truth or concept in an abstract way. 

The Kingdom of God kept coming to mind. I previously posted about this idea almost two years ago when I created a piece of digital art to illustrate this somewhat nebulous idea. Jesus Himself used parables to describe it, perhaps because it's beyond human language and understanding. It is, as John Piper explains, a mystery. 

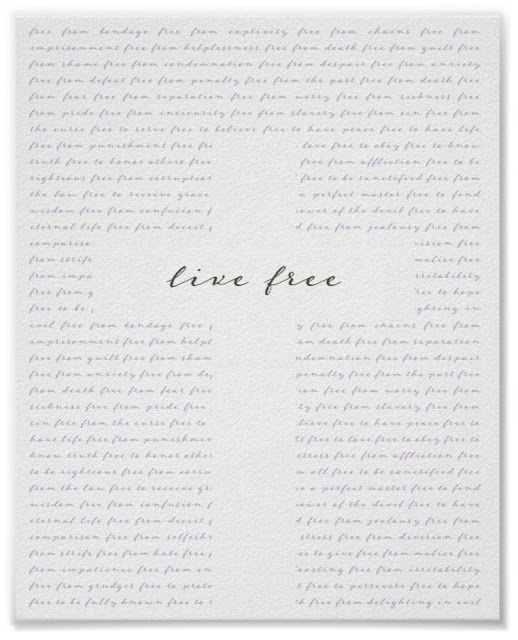
But that mystery is the key. It's the key to our hope: when the Kingdom of God is fully realized at the second coming, and when the Kingdom of God is here now. We can experience forgiveness, power, and the fruits of the Holy Spirit even now as the Holy Spirit is in us who believe.


The large blank wall above our couch was reserved for a painting that hinted at this idea. Using another common image from the Bible, a tree, I re-imagined that early digital art piece as lines from a cut tree. The dark center represents the world, while the white "bark" represents Heaven. Cracks in the wood, highlighted with orange, represent the Kingdom of God at work even now, penetrating our lives and bringing light to the darkness. It serves as both a reminder (to be the light) and a comfort (that God is at work within us).


Actual creation of this painting was a collection of experiments. Using yarn, glue, impasto gel, pouring medium, and a thickening gel, it features a variety of textures accomplishing different effects. Which could symbolize the different members of the body of Christ all working together as one...but that would be a different message. Or maybe that's just the beauty of art and its interpretation?

Friday, January 7, 2022

new in shop: live free poster


Living in the United States, we often hear the cry for freedom. Who are we if not the land of the free and the brave, after all? And as grateful as we are for the lives of the armed forces who fight for that freedom, let's not forget the most important life that was given for a freedom that goes beyond living in a democracy.

The government can't free us from our mental and spiritual prisons ... but Jesus can. I plan to hang this print in our home to encourage us a family. When life gets heavy, may we lean on God's promises for liberation. If you think you would benefit from these reminders as well, you can find it in my shop (colors are customizable if lavender isn't your thing).


Tuesday, October 26, 2021

new product: baby name nursery decor


New in the Etsy shop!

When I was a child, I had a very simple sign hung in my room. It had my name, written in black over a beige background, nothing fancy. But underneath it read "consecrated to God." A simple definition of my name, to be sure, but not insignificant. I saw that sign every day and pondered what it meant to be "consecrated." Even though I knew my parents hadn't labored and prayed over my name choice, I still felt special when I read that meaning.

That sense of identity is what pushed me to create this customizable sign (and this one for the boys), so the next generation can be likewise encouraged in who they are and what makes them unique. 

What message would you like your child to see every day?


Monday, March 1, 2021

permission to fail


We can learn a few (or more!) things from children.

When they have an idea, do they dissect it first? Do they seek to determine if it's worth the time and effort to create it? Mine don't. They grab that paper and eagerly scribble their creation. Sometimes it ends in a frustrated crumpled sheet thrown across the room, but does that mean trying was a mistake? "No," we tell them. "Mistakes are part of learning." But do we really believe that?

Mistakes require grace, and to accept grace, we have to admit mistakes have been made. So mistakes CAN be a beautiful thing! The sin of pride tells us that we must be perfect, we cannot mess up, because that is not who we are. We are better than that. In contrast, God's Word says "For by grace you have been saved through faith. And this is not your own doing; it is the gift of God, not a result of works, so that no one may boast" (Ephesians 2:8-9). Mistakes can humble us, reminding us of our need for God and the work of the Holy Spirit. And when we admit that need, we can finally accept His promises to move on our behalf: And God is able to make all grace abound to you, so that having all sufficiency in all things at all times, you may abound in every good work (2 Corinthians 9:8).


I had an idea. It itched at the back of my brain, thinking it just might work. I'd been observing different techniques with acrylic paint and wanted to combine a few to make a piece that we could hang in our living room. Procrastination was bountiful as I avoided failure. I tested the composition on my computer first, staying in the comfortable world of graphic design. But the itch grew until I couldn't resist scratching it - and creation finally began.

Did I love my creation as it was coming together? No. But it was the act of pursuing this idea--with permission to fail--that was life-giving. Because mistakes are okay. We can try again and do things differently, or we can paint over to make something new, but they are part of learning--and learning is a good thing. 


The painting is growing on me. It might not be perfect, but neither am I. And I'm learning that's okay.


Thursday, April 11, 2019

feeling that creative itch


Two and a half years. My blog hiatus is significant. Significantly long, sure, but also because it signifies a shift in my personal focus to full-time motherhood. We added a little boy to our family not long after my last blog post, and three kids filled my plate in its own very good way.

As our kids grow in independence, margin is sneaking back into my life. I'm feeling that call to practice creativity in art-filled ways, rather than creatively parenting/cooking/child-crafting. My latest piece was done after the kids were in bed and is being used as a background for some new products in my Zazzle shop.

Previous to that was a pastel drawing of a puzzled, maybe even a little sad, Boxer dog in preparation for a Christmas gift for my Boxer-loving in-laws. You can get that drawing on an iPhone case, or a mug, also through the Zazzle shop. I would share a photo of the painting I did of their beloved dog, but unfortunately I was too excited to gift it and didn't save a picture first.

My first priority remains my children, soaking up this time with them as I know the days are fleeting. But I'm excited to get back into interests that have been simmering far back on the stove and see how changes in life affect changes in handiwork.

Thanks for stopping by!

Wednesday, August 13, 2014

now available: minneapolis neighborhood map


Just to remove any doubts that my husband and I are nerdy: after one of our date nights, we wandered around the neighborhood looking at the cool architecture. When we couldn't figure out what the place once was, we went into the adjacent [and coordinated] library to discover its origin. Tucked into the back was MN history, including this map. In order to research further, I snapped these photos and then realized - what great inspiration for my own map! I was already using a Bodoni-esque font, so this map served to give me some further typographic ideas.


Since then, I've gone from one child to two, and somehow that has made me slightly more productive creatively. Not entirely sure how that works, but I'm really excited to share our map with others!


One of my favorite things about hanging a map in your home is the way it invites you to leave your mark. I can see other people placing a heart where they fell in love or made their first home, or having friends sign their names in their respective neighborhoods. We use ours to record our weekly date nights, and it's fun to reminisce the different evenings we've shared around our varied city.


Tuesday, July 15, 2014

fabric scrap name art

In preparation for our new baby girl's arrival, we moved C into her own "big girl" room. Once again, I got to decorate a room prior to having a baby, but this time it wasn't a nursery! 

Knowing we were going to have two girls, we decided C's room should definitely be girly. Someday they'll share that space and fill it with giggles, so it had to be lively and fun. I decided to paint the walls yellow, a bright, neutral color, so we could play up bright colors throughout the room without being overwhelming.


Initially I wanted the color scheme to be pink and orange, but after my husband shot down every bedding choice I suggested, I had to give it up. Turns out he doesn't like bright orange...only burnt orange...which is neither bright nor girly. We eventually found a bedspread that we liked, went with the color scheme of pink and teal, and decorating continued.


In the future, our girls will be in bunk beds, but until then C gets to own this space. And if she owns it, the room should bear her name, right? [When the girls are sharing, I'll make another one for O and their names can hang above their respective beds.] I wanted to bring in more of the fun fabric scraps that I used on the opposite side of the room, so I grabbed some tagboard, spray painted a Goodwill frame, and created her name wall art. 


Step 1: Print out your child's name, position it on tagboard sized to fit your frame, tape in place, and cut out the letters.


Step 2: Choose your scraps and tape them behind the individual letters.


Step 3: Turn the whole thing over and check your work.


Step 4: Turn it over again and use a hot glue gun to secure the fabric, outlining each letter with glue. Work in small areas at a time; the glue dries fast! Trim the fabric once you're done.


Step 5: Retrieve any missing counters for your letters and hot glue them in place.


That's it! What other things have you done with fabric scraps?


Thursday, February 27, 2014

room darkening nursery curtains


I've always been a "project" person. In fact, my mother stated the thing she was looking forward to most after I moved out would be the absence of my "piles," which were generally various projects in many states of "on hold."

Unfortunately for my husband, this habit is hard to break. Fortunately for my husband, I've at least managed to limit myself to one[ish] project at a time. Got a new creative idea? Better finish that last one first! Sometimes this only delays the beginning of a new idea rather than actually finishing an old one, but I'm a work in progress.

One of my latest projects got a jumpstart by an upcoming visit of family. Isn't hosting the best solution for accomplishing tasks? I simply *couldn't* have this fabric lying around any longer. It had to find its way into curtains.

And find its way it did. Using this tutorial as a basis. [Though, can I add a note about width? It omitted that detail, so for your reference, total finished width should be 1.5x-2x the width of your window, adding 4 inches per panel for hem allowance.] The nursery does have room darkening roll shades in addition to white accordian blinds, but roll shades are my arch nemesis. The spring loaded action [or non-action] drives me batty. So I simply *had* to make darkening curtains to eliminate athe roll shade. Now if only I actually completed that portion of the project ...

Thursday, December 19, 2013

burst 2: minneapolis neighborhood map


My husband and I love to explore. Our weekly date night [we’re totally spoiled, I know] usually consists of going to a restaurant we’ve never visited. One of us picks the place [usually my husband] and keeps it a mystery from the other until we’ve arrived.

As he drives us to our destination, I love taking in the various neighborhood flavors a large city has to offer. There is such diversity in culture, architecture, landscaping, and business offerings that driving through even familiar neighborhoods is a visual buffet.

Being an organized type, I needed a way to categorize this input. Fortunately, there is a solution already in existence: maps! I just needed a nice-looking neighborhood map that we could display in our home and remember where we’ve been and see where we still need to go.


And so this map was born. I’m still deciding how big I want it to be, and if I want to track our outings with pins or labeling the restaurants, but I’m really happy with the design result. Maybe I’ll add it to my Etsy store someday, but for now it’s just for us. That kinda makes me happy, too.

Friday, February 1, 2013

baby monogram


Back in the day when we were still expecting and the name was top secret, I did very well at keeping my mouth shut. It came as quite the shock, then, when my coworkers were asking me questions about the nursery room that I almost let a *big* hint slip. You see, while my lips were sealed, I forgot that hands can speak, too [particularly mine - watch out when I tell a story]!

Descriptions of curtains, shelving, and wall decor were willingly shared, hands flailing as I described this and that. Excitedly, I described how I wanted to create a monogram to hang on the wall - and that's when I almost slipped. Just as my index finger flew into the air and started to swing in a C-shaped flourish, I caught myself with wide eyes [meaning I had to explain what I had almost done]. Fortunately, they weren't able to gather the letter I almost drew for them, so the name remained a secret. Phew.


This was a super easy DIY project, and it was created entirely of items I found around the house. It's quick, too, so totally doable while the baby naps. Win. 

Step 1: Sketch your letter on Styrofoam. You could print the letter really large in a font you like, but in the interest of time, I drew freehand.

Step 2: Use a knife to cut out along your lines.


Step 3: If you're re-purposing packaging Styrofoam, cut off dramatic outcroppings. 


Step 4: Sweep up those loose bits and gather your materials, because this is where it gets fun.


Step 5: Wrap it up! First wrap a base layer where the yarn is wrapped basically in line. You can stop there, of course, but it felt a little mummy-ish to me, so I added more texture with yarn wrapped in a crisscross fashion.


Step 6: Grab some ribbon you have lying in your craft drawer and hang that stylish monogram on the wall!


Now doesn't that sound easy and fun? Trust me, it is. What are you waiting for? Go make one for yourself!

Thursday, February 9, 2012

tiny made tidy


The entryway in our house is really more of a landing. When we moved in, it had a coat rack that looked like a board with inserted dowels, hung at about waist level. It served as a place to put car keys and jackets; periodically one could even find mail precariously balanced on top of the dowel mess.

The problem with this wall is it's only 25" or so wide. And on this wall, I want to store shoes, keys, mail, coats, and other winter accessories. Neatly. Sadly, every organizational unit I found was too large. How to solve such a dilemma? Go modular!


One floating shelf, 2 boxes, 3 hooks,and 1 ingenious key hook/mail sorter later, and our essentials are not only easily accessible, but organized. Sometimes I gaze at in contented bliss. No, really, just ask my husband. Organization makes me very happy. Yeah, you can call me a nerd...

Once the direction was established and the pieces obtained, the project didn't even take very long. Cross another trouble zone off the list! [now...if only I could decide on paint color...]


Gussy Sews Inspiration Workshop!For more ideas, check out the Gussy Sews Inspiration Workshop. This week's theme is "organization."


Thursday, December 8, 2011

mason jar decor


Canning jars. They are *so very* versatile! 

One of my favorite parts of the Christmas season is all of the lights that come out to brighten our dark evenings. Here in Minnesota it gets dark eeeaaarrrly. Way too early. Or, maybe, perfectly early because it makes the sparkly lights that much easier to see!

Some day I'll share with you the joys that were canning this past fall, but for now, check out what you can do with the leftover jars:

1. Line up some of your favorite glass jars, varying sizes if you can.


2. Add in some "twinkle lights" (or Christmas lights,  if you prefer, but calling them "twinkle" means they can stay up much, much longer).


3. Wait for, oh, 5 pm to roll around and plug them in...


4. Instant warmth! 

Seriously. We had these on during Thanksgiving and everyone agreed they made the room feel cozier. I love plugging them in every night and basking in their glow...and if there's hot chocolate in my hand, all the better. 

Gussy Sews Inspiration Workshop!For more ideas, check out the Gussy Sews Inspiration Workshop. This week's theme is "holiday decor."


Thursday, September 29, 2011

upcycled wall decor

I am linking up with Gussy Sews Inspiration Workshop and the prompt this week is DIY. It's time to share my latest decorating project!


It's not much of a secret that I enjoy coffee. The enjoyment of coffee runs deep in my family; it's a part of life. You wake up, you have coffee. Then mid-morning, you have more. Lunchtime, afternoon-time, really anytime is time for coffee. I like to think that each cup has a crazy mix of relaxation and energy that is passed to the drinker.

When I saw this idea in a local doughnut shop [another one of my loves], it seemed a perfect fit for our kitchen. It's really easy, super cheap, and comes together in a snap.

Step one: Buy some burlap bags from your local coffee roaster. These came from Dunn Bros and were $1 each. Buy some foam core board, and cut it in half [or not if your piece is smaller].


Step two: Center the design and pin the burlap in place. Trim down edges and corners to reduce bulk.

Step three: Use a hot glue gun to secure the rough edges. Trim any extra fabric.


Step four: Hang on the wall. We nailed right through the board, so even hanging them was easy peasy!


Step five: Make some coffee and enjoy your new wall decor. [okay, maybe this part is optional]

Seriously, you should make this! If you're not into burlap sacks, fun fabric prints would be cute, too. I'd love to hear if any of you try this project! 

Gussy Sews Inspiration Workshop!

Wednesday, July 6, 2011

diy bathroom facelift


Alternatively, this post could be titled "the wonders of spray paint." Inspired by countless DIY bloggers out there, I armed myself with a can of white and a can of oil-rubbed bronze and spent the 4th of July weekend *finally* conquering this project!


As you can see, we had quite a few color combinations going on. Wood veneer with brass towel hooks, a wall shelf painted the same color as the wall, and a light fixture that was beige with green speckels. It was time to bring some unity [+ a more modern color theme].

The process is really simple: sand everything and paint multiple coats until you've covered every angle. In hindsight, I should have sanded the veneer a little deeper. The white paint didn't like to stick to some of the wood grain, so it's not as completely smooth as I was hoping for. I just tell myself it's the antique look. :-)

[Also in hindsight I might have not worn my rings at the time, or flip flops. Though the white flecks do add some character to my nail polish...]


There it is - all together! Someday I'd like to paint the walls a warm gray to match the floor, but until then, they just get painted in Photoshop. Seriously, it's a great way to visualize paint colors in existing rooms.


< This shot has little to do with the main subject of this post, but a lot to do with why I need to put so many things on that wall shelf. Check out how small these drawers are! What am I supposed to fit in there?

Hope you had a wonderful time celebrating the 4th last weekend, or finishing up some projects yourself!